To contact us Click
HERE
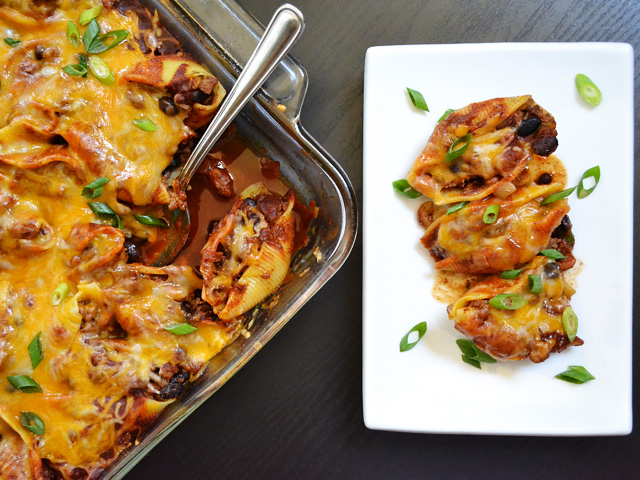
taco stuffed shells $14.65 recipe / $1.47 serving
But Mom! Everyone else is doing it!
I don't know who the first person was to stuff pasta shells with taco fillings, but it's
definitely a good idea. I kept seeing taco shells around the internet, so I had to make some, Budget Bytes style.
I made this recipe affordable by using homemade enchilada sauce (takes less than ten minutes), homemade taco seasoning (takes about two minutes), and beans cooked from dry in my slow cooker (cooked ahead of time and kept in the freezer until used). It took a little thinking ahead, but it definitely saved some bucks.
This recipe ended up being a little more work than I anticipated and I dirtied more dishes than I like to, but in the end it was
well worth it. It made a HUGE batch of ten large servings, nearly all of which went into my freezer. I've been eating these amazing shells for almost a week now and have yet to get tired of them!
I didn't realize that the ground beef I bought was in a 1.5 lb. package instead of just one pound, so thats part of why it made so much. You could also do this with just beans and no meat if you want it even less expensive!
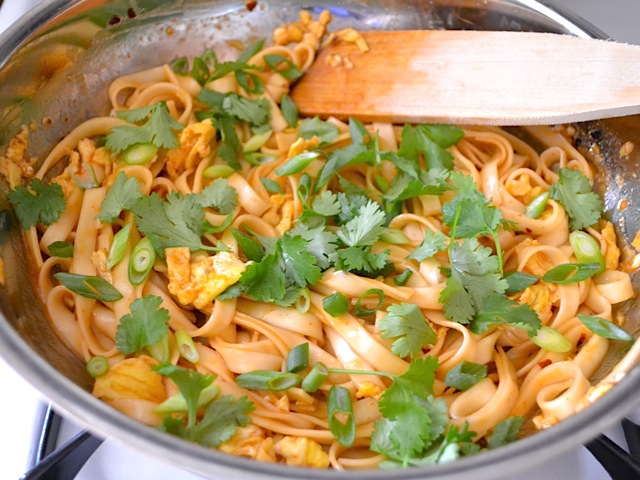
I paired this with some cilantro lime rice and I was a happy, happy girl.
Taco Stuffed Shells
 Total Recipe cost: $14.65 Servings Per Recipe: 10 (four shells each) Cost per serving: $1.47 Prep time: 15 min. Cook time: 45 min. Total: 1 hr.
 | INGREDIENTS | COST |
| 1 Tbsp | olive oil | $0.16 |
| 2 cloves | garlic | $0.16 |
| 1 medium | yellow onion | $0.49 |
| 1.5 lb. | ground beef | $6.09 |
| 2 cups | black beans | $0.56 |
| 2 cups | pinto beans | $0.56 |
| 1 recipe | taco seasoning | $0.34 |
| 1 tsp | salt | $0.05 |
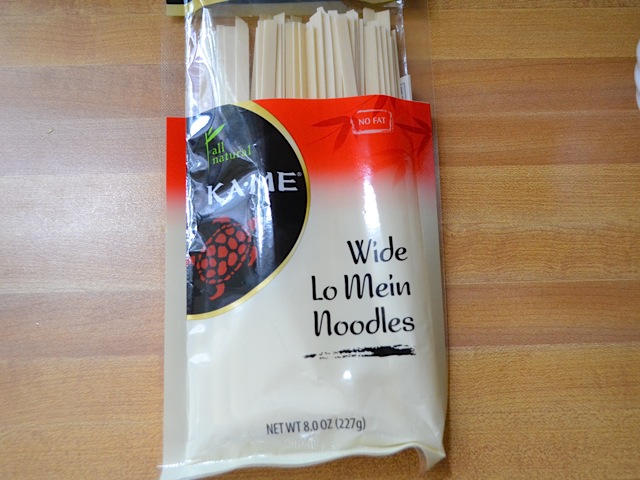
| 12 ounces | jumbo shells | $2.78 |
| 1 recipe | red enchilada sauce | $0.77 |
| 2 cups | shredded cheese | $2.50 |
| 3-4 whole | green onions | $0.19 |
| TOTAL | | $14.65 |
NOTE: If you don't want to make your own beans, taco seasoning, and enchilada sauce, here are the store bought equivalents: 1 (15 ounce) can of black beans, 1 (15 ounce) can of pinto beans, 1 packet of taco seasoning, and one (28 ounce) can of enchilada sauce.
STEP 1: Dice the onion and mince the garlic. Cook both in a large skillet over medium heat with the olive oil until soft and transparent (about 5 minutes).
STEP 2: Add the ground beef and continue to cook until browned. Mix together the taco seasoning ingredients while the beef is browning. Once the beef is fully cooked through, add the taco seasoning and stir to combine. Drain the beans and add to the skillet. Stir until combined. Taste and season with salt as needed (I used about 1 teaspoon).
STEP 3: Allow the beef and bean filling to sit while you cook the pasta shells. Bring a large pot to a boil, add the shells and cook just until tender. Be sure not to over cook the shells or they will be soft and difficult to fill. While the pasta shells are cooking, prepare the enchilada sauce.
STEP 4: Preheat the oven to 350 degrees. Drain the shells in a colander and rinse with cold water until they are cool enough to handle. Spray the inside of a 9x13 inch casserole dish with non-stick spray. Fill the shells with the beef and bean filling and place in the casserole dish. It's okay if they're not aligned neatly or if they topple over and spill some filling, it will still be good.
STEP 5: Once all of the shells are filled and in the casserole dish, pour the prepared enchilada sauce over top and then add the shredded cheese. Cook in the preheated oven for about 30 minutes or until the cheese is melted and everything is heated through (all ingredients are already cooked, so there is no real danger of undercooking here. You just want to get it all HOT).
STEP 6: Slice the green onions and sprinkle over top after it comes out of the oven. Serve hot!

Step By Step Photos
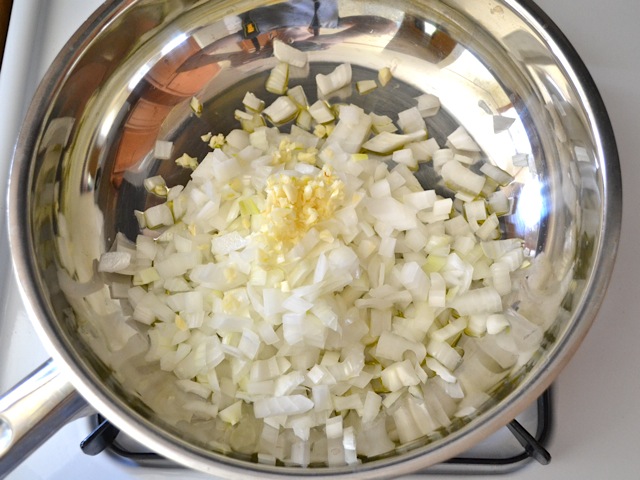 Start by dicing the onion and mincing the garlic. Add them to a LARGE skillet with the olive oil and cook over medium heat until soft and transparent.
  Add the ground beef and continue to cook until it is FULLY browned.
  While the beef is browning, mix up your taco seasoning (or use a store bought packet).
  Once the beef is fully cooked, add the taco seasoning and stir until combined.
 Add the drained beans (because WE LOVE BEANS!). Stir until combined. Taste and add more salt if needed (I added about one teaspoon).
  Next, cook the pasta according to the package directions. Make sure to not let them get too soft or they'll be all wobbly and difficult to fill. Also, while the pasta is boiling away, you can quickly prepare the enchilada sauce (because it only takes 5-10 minutes).
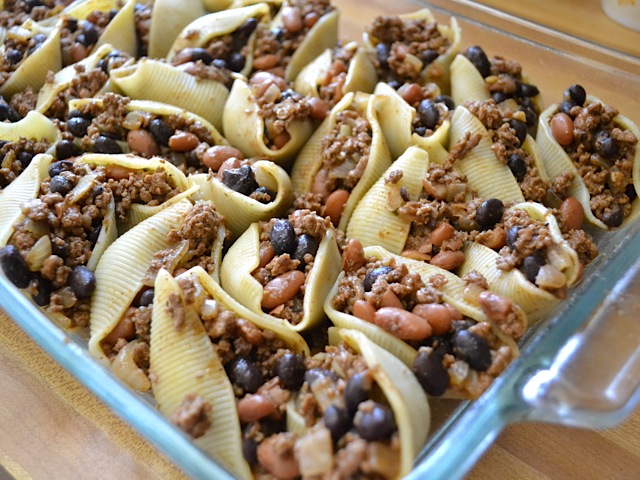 Drain the pasta and rinse it with cool water until it's cool enough to handle. Spray a LARGE casserole dish with non-stick spray. Fill the shells and place them in the casserole dish. I found the easiest way to fill them is to hold a shell in one hand and fill it with a spoon using the other. Now, the shells WILL topple over and spill their guts, but that's okay because when you serve it you'll just be scooping everything up anyway.
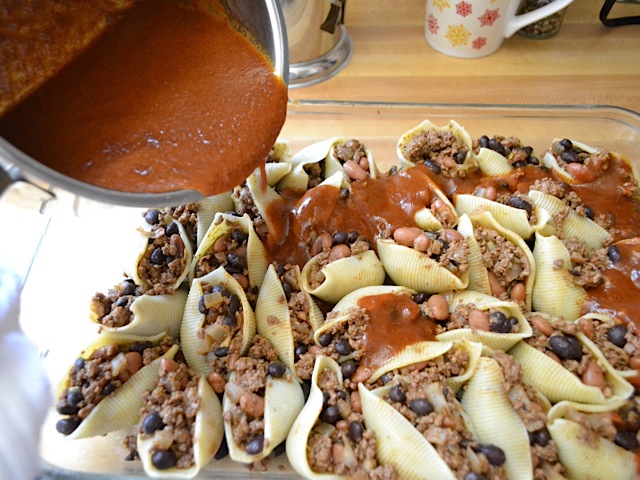
 Pour the enchilada sauce alllll over the whole thing. This is where it starts to get really good. Preheat your oven to 350, too.
 Cover that sucker with cheese and pop it in the oven. Cook it at 350 for about 30 minutes or until the whole thing is hot and the cheese is nice and melty on top.
 And then you're in taco shell heaven. Oh yeah, sprinkle the green onions over top after it comes out of the oven.
 As usual, I portioned the whole thing out before refrigerating. I actually ran out of containers, that's how much it made. Most of these containers ended up in the freezer after they cooled in the fridge. I also added a scoop of cilantro lime rice to each container. I've been having very, VERY happy lunches ever since! :D


 I'd like to introduce you to my foodie sister and friend, Sherri. Sherri and I met when I won the National Flour Power Competition sponsored by The popular online recipe club called, "Just A Pinch Recipe Club" [JAP] of which Sherri and I are both members. Part of my winnings was to attend a live Showcase event held in Franklin Tennessee where I recreated my winning cake in front of a large audience of JAP members. Sherri was the emcee and previous winner with her "Smokin' Baby Got Back Ribs." We met for dinner the night before the Showcase, and we bonded instantly over our love of cooking and sharing. What a fun and unforgettable day we had on the day of the Showcase! She is an award winning cook, and I'm delighted she's joined me in my kitchen. Sherri, welcome and thank you for stopping by to share a recipe in my Southern Kitchen!