30 Mayıs 2012 Çarşamba

Tuesday Cat.

To contact us Click HERE
Ok they have changed the blog again and this time it let me up load a picture. Not sure I like this new look I'm an old fart and do not like change when I was used to the last one.
Any way this is Bob again and poor thing I don't know how he gets around looking out at the world with crossed eyes. He appears to be the top Tom in the area for now so it must not be stopping him. He has some battle scars and has lost some fur and he is big and solid. Poor Moonface is the older Tom and we make sure when Bob is at the house they stay apart. Bob and Moonface belong to someone in the neighborhood but seem to come eat at our house.

Spanish Rice

To contact us Click HERE
This is a side dish we had for Mexican Night. It was easy but to tell the truth we have found the rice mix is just as good.
1 can stewed tomatoes
1 1/8 cups chicken stock
1 cup rice
3/4 teaspoons butter
1 1/2 teaspoons chili powder
5/8 teaspoon oregano
1/2 teaspoon garlic salt
3/4 teaspoon cumin
In medium saucepan combine all ingredients (kinda of squeeze the tomatoes to break up.)
Bring to a boil and reduce heat to low
Cover and simmer for 25 minutes or till rice is done
Garnish with green onions.

What I have been up to

To contact us Click HERE

Hello everyone I cannot believe it has taken me so long to post anything but let me tell you why I have been away.


It all started when it was wash day and wife thought she heard water running. Trip out side found a lake growing in the back yard and under the house. Not good.

I was out of town the coming week so all running of water was cut to a minimal so it could dry out and I could get under the house next weekend. We did have a loose pipe and thought that was it but when we washed there it was again and we could not see where it was coming from. So that meant under ground. OH NO.

Another week went by with out using much water no cooking just sandwiches so we didn’t use much water again to dry out.

Had a plumber come out that Sat and he ran a snake down the hole and thank the Lord it was not a broke pipe but roots. Yea! I was getting tired of sandwiches.

Above is one of the other Toms that come by for a snack we call him Badger.

Pasta and cheese

To contact us Click HERE
We did not have any of the pasta shells the dish called for but we used some pasta called radiatore. We also felt it was a little dry maybe less bread crumbs or because we used the wrong pasta?
1 lb small or med pasta shells
5 Tablespoons unsalted butter divided
1 cup heavy cream
8 oz. fontina cheese shredded
salt
pinch of nutmeg
1/3 cup panko bread crumbs
1/4 fresh grated parmesan cheese
Preheat oven to 400
cook pasta according to directions just till 1 2 minutes shy of al dente
dice 4 tablespoons of butter in a large mixing bowl. Warm cream in a small sauce pan or microwave. Cover and keep warm
When pasta is cooked add to bowl and toss to coat well, next stir in warm cream and cheese till it starts to melt.
Salt to taste and nutmeg
Pour into a butter 2 quart casserole dish. Melt remaining butter and mix in panco breadcrumbs and parmesan cheese, toss with a fork and sprinkle evenly over pasta.
Bake until sauce is bubbling and top turns golden brown about 20 minutes.

Baked Salmon with Basil Pesto and Tomatoes

To contact us Click HERE
We made this before really good home grown tomatoes are coming in and we know this would be soooo much better with a home grown tomatoes.
2 salmon fillets about 6 oz each
2 tsp. olive oil
4 tsp basil pesto (we bought some from Sams but later this year we are going to try the real thing.)
we used 1 Roma tomato.
Preheat oven to 450
Tear two pieces of foil big enough to wrap salmon with some overlapping.
Place 2 tsp. of oil on foil in center place salmon on top of oil.
Spread each piece of salmon with 2 tsp each then arrange tomatoes on top.
Wrap other piece of foil on top and seal edges.
Place packet on baking sheet and cook 15 minutes
Remove from oven and let sit 2-3 minutes. Open carefully and serve while salmon and tomatoes are hot.

26 Mayıs 2012 Cumartesi

balsamic beef kebabs $16.95 recipe / $2.82 serving

To contact us Click HERE

balsamic beef kebabs

$16.95 recipe / $2.82 serving
I love kebabs. They're fresh, filling, and super easy. ...and to me they say "SUMMER!"

The cost per serving for this recipe is almost double than most my recipes, but when I stop to think about how much this would cost in a restaurant, I'm very, very happy. It might not be an every night splurge, but it's very worth it for a Friday date night or lazy Sunday afternoon with the fam. Also, I served my kebabs over rice, but didn't include that in the price because you could serve these with any number of sides (past salad, garden salad, rice pilafs, fresh rolls... many options).

Kebabs are definitely best on the grill, but I, like many people, don't have a grill. So, I cooked these kebabs under my broiler. Broilers are very similar to grills in that they cook food via direct heat at a close range. I have a gas stove, so my broiler is even closer to a grill because there is an open flame. Every oven is different and when cooking hot and fast (as with a broiler), you'll really need to just test out the cook time with your particular oven. In other words: keep an eye on it! Mine took about 5-7 minutes on each side at a distance of about 4-5 inches from the heat source.

balsamic beef kebabs

Balsamic Beef Kebabs

Print Friendly and PDF

Total Recipe cost: $16.95
Servings Per Recipe: 6 (2 kebabs each)
Cost per serving: $2.82
Prep time: 15 min. Marinate time: 1-4 hrs. Cook time: 15 min. Total: 1 hr. 30 min.

INGREDIENTS COST
2 lb. top round roast $10.01
1/3 cup balsamic vinegar $0.96
1 Tbsp olive oil $0.18
1/2 tsp worcestershire sauce $0.02
2 cloves garlic, minced $0.16
1 tsp salt $0.05
to taste pepper $0.05
2 medium bell peppers $0.99
1 large red onion $1.45
8 oz. button mushrooms $2.50
2 Tbsp balsamic vinegar $0.40
1 Tbsp olive oil $0.18
TOTAL $16.95

STEP 1: Cut the beef roast into one inch cubes (or 36 pieces of roughly the same size). In a small bowl combine 1/3 cup balsamic vinegar, 1 Tbsp olive oil, 1/2 tsp worcestershire sauce, 2 cloves minced garlic, 1/2 tsp of salt, and some freshly cracked black pepper. Pour the marinade into a zip top bag, add the beef cubes, and marinate for at least an hour.

STEP 2: Lightly wipe off the mushrooms and cut each one in half. Place in a bowl and sprinkle with the remaining 2 Tbsp of balsamic vinegar, 1 Tbsp of olive oil, a pinch of salt, and some more pepper. Toss the mushrooms to coat, and refrigerate until you're ready to make the kebabs.

STEP 3: Just before you're ready to make the kebabs, cut the bell pepper and red onion into one inch pieces. Preheat the broiler on high. Take the meat and mushrooms out of the refrigerator and begin to build your kebabs. If you cut 36 pieces of beef, make sure each kebab has 3 pieces.

STEP 4: Coat a broiler pan with non-stick spray. Place the kebabs on top (6 at a time). Adjust the oven rack so that the top of the broiler pan will be about 4-5 inches from the heat source. Place the kebabs in the oven and broil for 5-7 minutes, turn the kebabs over, and broil for another 5-7 minutes on the second side. Every oven is different, so check your first batch after 3-4 minutes. You will want to flip the kebabs when they have achieved a crispy brown exterior. Use that time as a guide for the rest of your kebabs.

balsamic beef kebabs

Step By Step Photos


whole roast
This is the roast that I bought. Many stores will have kebab meat already cut, but they may charge more per pound for it. This "top round roast" is flat like a steak, but about an inch or so thick. Also, since the kebabs will cook quickly, you will want a meat that does not have a lot of connective tissue running through it. Connective tissue breaks down and gets soft when you cook long and slow, but does not during quick cooking, like with grills or broilers.

cut beef
First I cut the beef into one inch cubes. I wanted to make sure that I had enough for three pieces of beef for all 12 kebabs, so I cut a few cubes on the diagonal until I had 36 pieces.

balsamic marinade
Next, mix up the marinade. Combine 2 cloves minced garlic (not pictured), with 1/3 cup balsamic vinegar, 1 Tbsp olive oil, 1/2 tsp worcestershire sauce, about a 1/2 tsp of salt, and a generous helping of freshly cracked pepper.

marinate beef
Add the marinade and beef chunks to a zip top bag, mix it all up, and then refrigerate fro 1 to 4 hours.

marinate mushrooms
Mushrooms are like little flavor sponges, so I wanted to marinate those too. I kept the rest of the vegetables fresh and not marinated because I didn't want everything to taste exactly the same. To marinate the mushrooms, throw them into a bowl or container and sprinkle with a little more balsamic vinegar, olive oil, salt, and pepper. Toss them to coat and refrigerate them until you're ready.

cut vegetables
Cut the onion and bell pepper into one inch chunks as well.

make kebabs
If you have a broiler pan, coat it lightly with non-stick spray. If you don't have one, you can simply place some wire cooling racks over a baking sheet. This will keep the kebabs up and out of the juices as they drip off. Adjust the rack in your oven so that the tops of the kebabs will be 4-5 inches from the heat source (make sure the top of the pan/kebabs will be at that distance, not the ove rack itself). Turn the broiler on high to preheat. Build the kebabs by alternating vegetables and meat. I made sure that I had 3 pieces of meat and 2 mushrooms per kebab (since those were the yummiest pieces!).

cook kebabs
So here is the slightly tricky part... every oven is different. My broiler is a gas flame, yours may be an electric element. Your 4-5 inches may be slightly different than my 4-5 inches were... SO, you have to keep an eye on them. Let them cook for a few minutes and then give them a peek. When they achieve a nice brown, almost crispy on the edges color, flip them over and cook the second side. Mine took about 5-7 minutes on each side. Also, use your nose as a guide. When you start to smell that awesome caramelized beef scent, you know you're about ready to flip them.

balsamic beef kebabs
I served mine over jasmine rice because it's my absolute favorite! To bring these as my work lunch, I simply put some rice in a container and then slid the meat and vegetable pieces off of the stick and into the bowl. Lunch has been a happy time the past few days :D


shaved zucchini $2.25 recipe / $0.56 serving

To contact us Click HERE

shaved zucchini

$2.25 recipe / $0.56 serving
What makes something delicious? It's not just flavor. It's flavor, texture, visual appeal, aroma... all of these things together. Sometimes simply changing the texture of an item can change the whole experience.

I love zucchini and prefer to cook it quickly and simply so that its flavor shines through. So this time, instead of chopping it into chunks before being sauteing it as I usually do, I decided to shave it into ribbons. The delicate texture really highlighted that fresh, spring zucchini flavor! Plus, it provided plenty of surface area for the parmesan to adhere.

I seasoned my zucchini with just a little salt, pepper, red pepper flakes and a quick sprinkle of parmesan, but you could take this dish in many directions. Try adding a little basil, Italian seasoning mix, or substitute the parmesan for feta or goat cheese.

shaved zucchini

Shaved zucchini

Print Friendly and PDF

Total Recipe cost: $2.25
Servings Per Recipe: 4
Cost per serving: $0.56
Prep time: 10 min. Cook time: 10 min. Total: 20 min.


INGREDIENTS COST
4 medium zucchini $1.76
1 Tbsp olive oil $0.19
to taste salt & pepper $0.05
1/4 tsp red pepper flakes $0.02
1/4 cup parmesan cheese $0.23
TOTAL $2.25

STEP 1: Rinse the zucchini well and cut off the ends. Lay the zucchini down on the cutting board and use a vegetable peeler to shave it into ribbons. Once you've shaved down to the center of the zucchini, roll it 1/4 the way around and start shaving again. Repeat this until you can shave no more.

STEP 2: Heat 1 Tbsp olive oil in a large skillet over medium heat. Once it is hot, add the zucchini ribbons. Saute, stirring carefully, until the zucchini has softened and turned bright green (about 7-10 minutes). Season with salt, pepper, and red pepper flakes to taste.

STEP 3: Use tongs to remove the zucchini ribbons from the skillet (there will be quite a bit of moisture in the bottom of the skillet) and place into serving bowls. Sprinkle with about 1 Tbsp of parmesan cheese per serving just before eating.

shaved zucchini

Step By Step Photos


whole zucchini
Begin by washing your zucchini. The amount that this recipe yields will depend on the size of your zucchini. Mine were each about 8 inches long and about 1.5 inches thick at their widest part.

shave zuccini
Using a sharp vegetable peeler, shave the zucchini into ribbons. This took a bit of experimenting, but I found that if you lay the zucchini down on the cutting board, hold one end with one hand and horizontally shave with the peeler, you can get the best ribbons. Once you shave down to the center of the zucchini, give it a quarter turn and start shaving again. You'll end up with some leftover "cores" but you could always chop those up and saute them separate if you'd like. Don't worry if your ribbons aren't perfect, just try to make them thick by using pressure as you shave.

oil in skillet
Heat a tablespoon of olive oil in a large skillet over medium heat. Once it's hot, tilt the skillet to spread the oil around.

raw zucchini ribbons
Add the raw zucchini ribbons. Gently stir them as they cook. I used tongs to carefully pick them up, flip them over, and move them around the skillet as they cooked.

wilted zucchini ribbons
After a couple of minutes the zucchini will begin to soften. Sprinkle with salt, pepper, and red pepper flakes. Continue to cook and gently stir for a few more minutes.

cooked zucchini ribbons
Stop cooking when the zucchini is soft, but still bright green (about 7-10 minutes depending on the size of the skillet, how many ribbons you have, and the heat of your burner). The zucchini will have given off a good bit of water as it sauteed. Use tongs to remove the ribbons from the skillet and place into bowls or plates.

shaved zucchini
Just before eating, sprinkle with parmesan cheese. Season with more salt and pepper as needed. I wouldn't suggest adding the parmesan to the zucchini while it is in the skillet because of the moisture in the bottom of the pan. The parmesan will just wash right off!

chili cheese beef n mac $7.81 receipe / $1.30 serving

To contact us Click HERE

chili cheese beef n mac

$7.81 receipe / $1.30 serving
WARNING: Comfort food ahead! This dish contains pasta, beef, and cheese. It's hearty and delicious. Proceed at your own risk! ;)

Say you grew up on Hamburger Helper (no shame), but now that you're an adult and all classy and stuff, you just can't bring yourself to buy one of those cardboard boxes with the mystery powdered cheese sauce. THIS recipe is your grown up "I actually know how to cook now" substitute!

This recipe is still really easy, really fast, and only requires one pot. Like Hamburger Helper, it's hearty and rich, so I would suggest serving it with a sizable side of something green. I'm going for some simple steamed broccoli with just a pinch of salt and pepper. Broccoli pairs famously with both beef and cheese, so it's a natural.

If this recipe is still too rich and cheesy for your tastes, stay tuned. I'm sure that by the weekend I'll be in the mood for something super light, fresh, and uber healthy! It's the yin and the yang y'all!

chili cheese beef n mac

Chili Cheese Beef n Mac

Print Friendly and PDF

Total Recipe cost: $7.81
Servings Per Recipe: 6 (about 1 cup each)
Cost per serving: $1.30
Prep time: 0 min. Cook time: 35 min. Total: 35 min.

INGREDIENTS COST
1 Tbsp olive oil $0.19
1 lb. ground beef $4.13
2 cloves garlic $0.10
1 small onion $0.55
2 Tbsp all-purpose flour $0.02
1 Tbsp chili powder $0.15
1/2 tsp smoked paprika $0.05
1/2 tsp dried oregano $0.02
1 (8 oz.) can tomato sauce $0.48
2 cups beef broth** $0.22
2 cups (1/2 lb.) dry macaroni $0.65
1 cup (4 oz.) shredded sharp cheddar $1.25
TOTAL $7.81
**I use a beef base to make my beef broth, which is far less expensive than cans/cartons of broth.

STEP 1: Brown the ground beef in a large pot over medium along with 1 Tbsp of olive oil. Once browned, drain off the excess fat. While the beef is browning, dice the onion and mince the garlic.

STEP 2: Add the diced onion and minced garlic to the browned and drained beef. Continue to cook and stir over medium heat until the onions are soft and translucent. Once the onions have softened, add 2 Tbsp of flour and cook for one minute more while constantly stirring. It's okay if it coats the bottom of the pot, just make sure the heat is not so high that the flour burns.

STEP 3: Add the chili powder, smoked paprika, oregano, tomato sauce, and 2 cups of beef broth (or beef base/bouillon cubes and water). Stir to dissolve any bits that are stuck to the bottom of the pot.

STEP 4: Add the dry pasta, place a lid on top, and allow it to come up to a simmer. Once it reaches a simmer, reduce the heat to low, and let simmer for about 15 minutes or until the pasta is soft and has absorbed all of the liquid. Stir every few minutes to make sure it's not sticking on the bottom of the pot. If it gets dry before the pasta has fully softened, add a touch of water.

STEP 5: Once the pasta has finished cooking, turn the heat off and stir in the shredded cheese. Serve hot.

Chili Cheese Beef n Mac


Step By Step Photos


ground beef
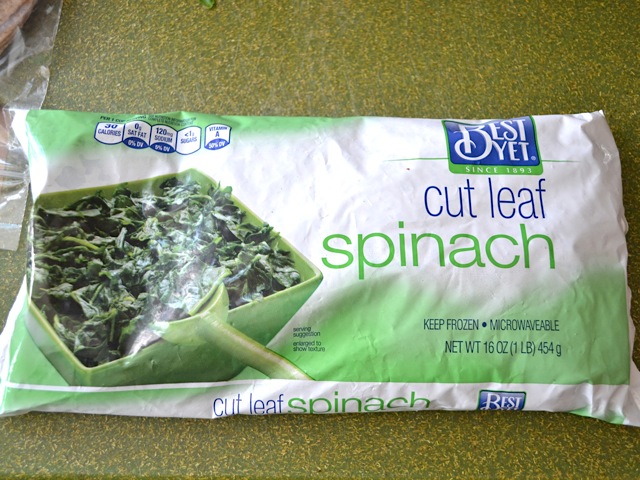
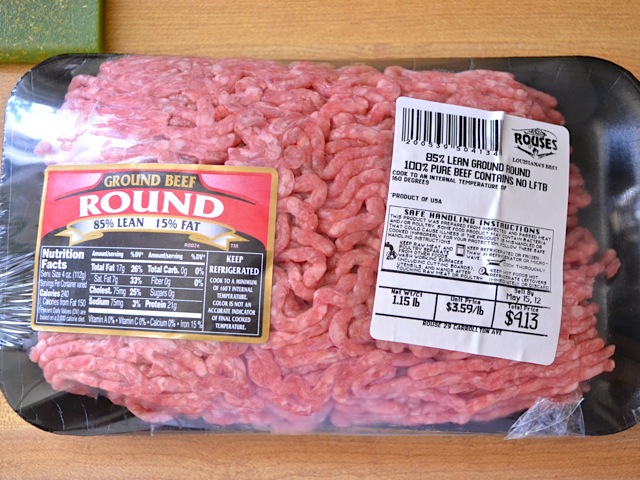
This is the ground beef that I used. You can use a leaner ground beef if you'd like, you'll just have less fat to drain off.

browned ground beef
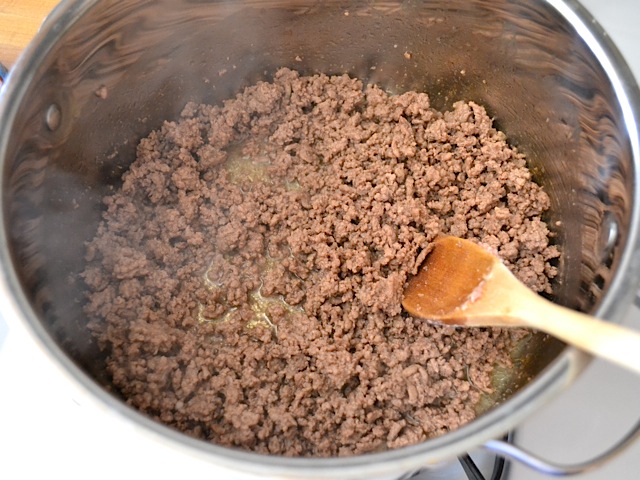
Brown the ground beef in a large pot. Use about 1 Tbsp of olive oil to keep it from sticking. If it does stick a little, it's okay because the liquids added later will dissolve it off of the bottom (this is called deglazing). Drain the beef well once it is fully browned.

onion and garlic
While the beef is browning, dice the onion and mince the garlic. Once the beef is browned and drained, add the onion and garlic to the pot and continue to cook.

add flour
Once the onion and garlic have softened, add the flour. The flour will combine with the residual beef fat to create a roux that will help thicken the sauce. Stir the flour in and cook for one minute while continually stirring. This will slightly cook the flour to get rid of that "floury" taste. It may coat the bottom of the pot, but that's okay. Just make sure it doesn't burn (turn the heat down if it starts to smell burned).

spices
Also add the chili powder, smoked paprika, and dried oregano.

film on bottom of pot
I took this picture before adding the liquids so that you could see how the flour (and spices) kind of coat the bottom of the pot. The liquids in the next step will dissolve all of that off of the bottom.

liquids
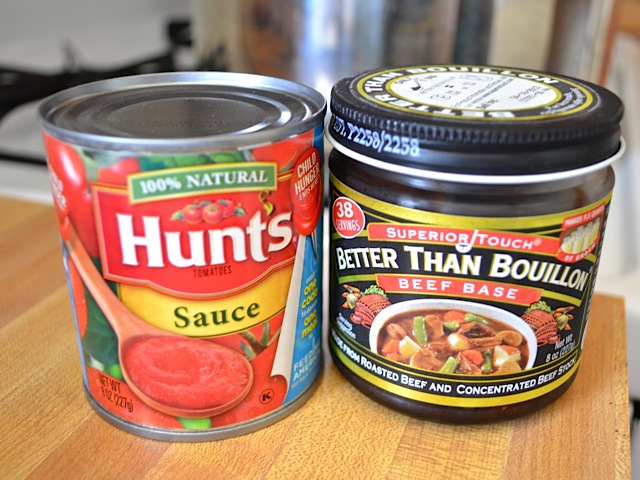
The liquids that create the sauce (and cook the pasta) are tomato sauce and beef broth. I like this brand of beef base because it tastes better than the beef bouillon cubes and is far less expensive than buying cans or cartons of beef broth. But, you can use the cubes or broth if you'd like. Just make sure to have 2 cups worth.

add liquids
Add the 8 oz. of tomato sauce and two cups of beef broth. Stir this mixture until all of the flour and spices are dissolved off of the bottom of the pot (you should be able to feel it with your spoon).

add pasta
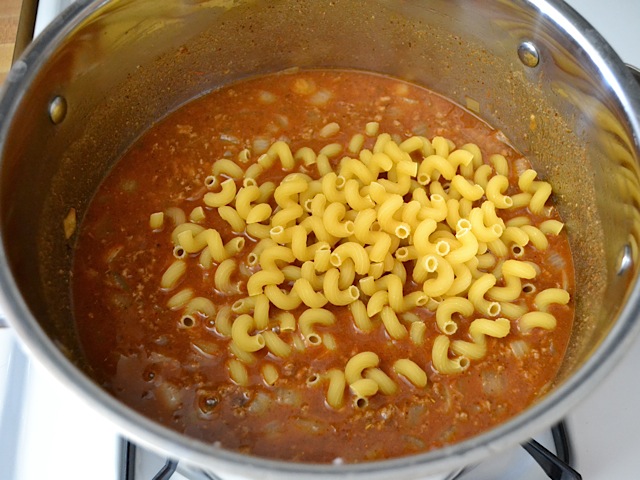
Stir in two cups of dry pasta. Place a lid over the pot and allow it to come up to a simmer. Once it reaches a simmer, reduce the heat to low and let it continue to simmer for about 15 minutes. Stir every so often to make sure it's not sticking to the bottom of the pot.

cooked pasta
After about 15 minutes, the pasta should be very tender and have absorbed most of the liquid. If you use a different pasta shape (especially a smaller one), it may soak up more liquid than mine did. If you find that the mixture becomes dry before the pasta is soft, you can add a little water as needed.

add cheese
Stir in the shredded cheddar cheese. I like sharp cheddar for this because I feel it has more cheesy flavor.

cheesey chili beef n mac
And then it's creamy, cheesy, and delicious!

chili cheese beef n mac
It's Hamburger Helper's older, more mature cousin.

chili cheese beef n mac
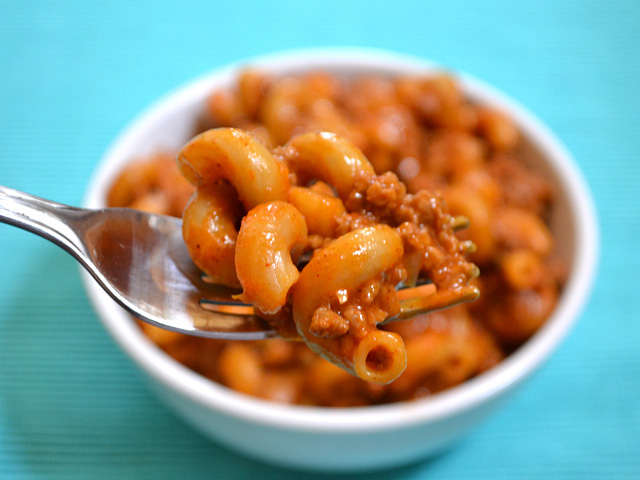
Are you drooling yet?

mediterranean quesadillas $11.42 recipe / $1.14 each

To contact us Click HERE

mediterranean quesadillas

$11.42 recipe / $1.14 each
I LOVE quesadillas. Crispy on the outside, all warm and melty on the inside... Oh so good. While I don't think I can top my favorite black bean quesadillas, these mediterranean quesadillas are an excellent alternative when I have Tex-mex burnout. ...because when you eat as much chili powder and cumin as I do, burnout does happen.

The trick to making these quesadillas affordable is to choose the filling ingredients based on what is priced good in your local stores. For instance, I really, really wanted those little tangy roasted tomatoes packed in oil, but I couldn't find them for any less than $5. Instead, I was able to find a large jar of roasted red peppers for just $1.89. You can and should play around with the filling components. Some other ideas include: roasted garlic, garbanzo beans, roasted or sun dried tomatoes, pine nuts, fresh basil, zucchini, or eggplant.

When I buy an ingredient for a recipe, I prefer to use the whole container to prevent odds and ends that get wasted. With this recipe, I've used small amounts of very flavorful ingredients that also happen to be pricy (feta, kalamata olives, roasted red peppers). Luckily, these ingredients also stay fresh in the refrigerator for greater lengths of time than most fresh ingredients, giving me more time to use them up. Use the extras for salads, frittatas, or sandwiches.

mediterranean quesadillas

Mediterranean Quesadillas

Print Friendly and PDF
Total Recipe cost: $11.42
Cost per quesadilla: $1.14
Prep time: 20 min. Cook time: 10 min. each Total: 30 min.


INGREDIENTS COST
10 (8 inch) flour tortillas $1.93
1 lb. frozen chopped spinach $1.49
1 small red onion $0.77
1/2 (12 oz.) jar roasted red peppers $0.85
1/3 (9.5 oz) jar kalamata olives $1.66
handful fresh parsley (optional) $0.43
4 oz. feta cheese, crumbled $1.74
8 oz. shredded mozzarella $2.50
1 tsp dried oregano $0.05
TOTAL $11.42


STEP 1: Thaw the frozen spinach and then place in a colander. Press the spinach against the sides of the colander to squeeze out as much moisture as possible. Place the drained spinach in a large bowl.

STEP 2: Cut the red onion into very thin slices. Cut the roasted red pepper into small strips, roughly chop the kalamata olives, and roughly chop the parsley. Place all four ingredients in the bowl with the spinach.

STEP 3: To the bowl also add the oregano, crumbled feta, and shredded mozzarella. Stir very well until everything is evenly distributed.

STEP 4: Divide the filling among all ten tortillas, spooning it into one half and then folding the bare half over top (I used roughly 3/4 cup per tortilla). Heat a non-stick skillet over medium to medium/low heat. Cook the quesadillas on each side until the outside is golden brown and crispy and the cheese inside has melted.

These quesadillas can also be frozen prior to cooking and then warmed in a skillet straight from the freezer. When cooking the quesadillas from the frozen state, use a lower heat to allow the inside time to thaw and melt before the outside becomes crispy.

mediterranean quesadillas


Step By Step Photos


cut spinach
For this recipe, I prefer the "cut spinach" that comes frozen in a bag rather than the kind that comes in a frozen block. This type of frozen spinach is cut into smaller pieces, is less stringy, and seems to have less moisture to squeeze out. Allow the spinach to thaw completely before you begin.

squeeze spinach
Place the thawed spinach in a colander and press it against the sides to squeeze out as much moisture as possible. Soggy quesadilla = bad.

chop ingredients
Roughly chop the parsley and kalamata olives. Cut the red onion into very thin strips. Slice the roasted red pepper into thin strips as well. You want small pieces so that every bite gets bits of multiple ingredients.

combine vegetables
In a large bowl, combine the squeezed spinach, red onion, kalamata olives, roasted red pepper, and parsley. Stir well.

add cheese oregano
Next, add the crumbled feta, shredded mozzarella, and dried oregano. Stir very, very well to make sure everything is evenly mixed.

fill quesadillas
Divide the filling among all ten tortillas. Spread the filling over one half of the tortilla and then fold the empty half over top.

stacked quesadillas
I like to fill all ten at once (stacking them as I go to keep them out of the way) so that I can adjust the amount in each if I end up with too much filling at the end or not enough. I started out with a heaping half cup for each but had some left over at the end so I went back and put a little more into each one.

cook quesadillas
To cook the quesadillas, place them in a warm skillet and cook on each side until the outside is golden brown and crispy and the cheese has melted on the inside. I prefer to use some sort of non-stick skillet but if you don't have one, just give a regular skillet a quick spritz of non-stick spray.

cut quesadillas
To cut the quesadillas, use a sharp pizza slicer and cut into thirds.

mediterranean quesadillas
Oh yum, yum, yom, nom, NOM!