27 Haziran 2012 Çarşamba

Lemon-Blueberry Cobbler Pie

To contact us Click HERE

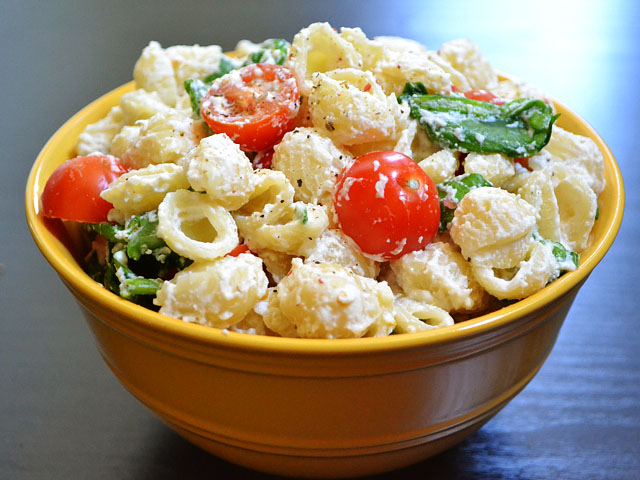
Blueberries and lemons...a glorious combination!  I don't know about you all, but, I'm often driven to create my dishes based on what's in season or readily available at the market.  Today, blueberries, were plentiful at the market,  and this cobbler pie somehow made it onto my "to do" list this afternoon.  Funny, not only did it make onto my "to do" list but, it also became my top priority!  It turned out just the way we like it, gooey, juicy, and ready to be served up with creamy vanilla ice cream for an a la mode piece of blueberry heaven!  If you let this pie sit for a while, and cool to room temperature, the juices will thicken and the pie will cut and serve more like a pie...however, my family never lets it sit long enough for the juice to thicken, making it more the consistency of a cobbler.  Either way, it's blueberry-licious!!

You'll need:

1 refrigerated pie crust
4 1/2 cups of fresh blueberries rinsed and dried
1 cup of granulated sugar
1/2 cup all purpose flour
1 Tbs. lemon zest
1 1/2 Tbs. lemon juice
1 tsp. vanilla

Crumb topping:

3/4 cup brown sugar
1/2 cup all purpose flour
1/2 cup quick cooking oats
1/2 cup toasted sliced almonds
7 Tbs. cold butter
1 1/2 tsp. cinnamon
1/4 tsp. salt

Preheat the oven to 350 degrees and lightly spray a deep dish 9 inch pie plate with butter cooking spray. Remove the  pie crust from the refrigerator and leave it on the counter for 20 minutes to warm to room temperature.  Unroll the pie crust carefully then fit it firmly into the pie plate.  In a medium size mixing bowl, toss the blueberries together with the sugar, flour, lemon zest and juice, and vanilla until combined.


Pour this mixture into the pie shell.  Spread evenly.


To prepare the crumb topping,  pulse together the all purpose flour, oats and butter in a food processor until it resembles coarse crumbs.  You can also do this by hand using a pastry blender or two forks, but, the food processor makes it so quick and easy!!  Add the buttered crumbs to a bowl, and using a spoon, mix in the brown sugar, cinnamon, salt and lastly the toasted almond slices.  Add the almonds last, so, they won't break-up.


 After you mix the crumbs together, it will look like this...


Sprinkle the crumbs over the blueberries.  I have a weakness for strudel and crumb toppings, so. this  is a thick crumb topping.  It can also be used for any cobbler or fruit pie. 


Place into the oven and bake for 40-42 minutes.  Allow the cobbler pie to sit for 30 minutes before cutting, in the case of this pie, that's "code" for scooping!  Serve with vanilla ice cream or whipped cream.  Yield: 8 servings

Gluten-Free Parmesan Chicken and Pasta

To contact us Click HERE

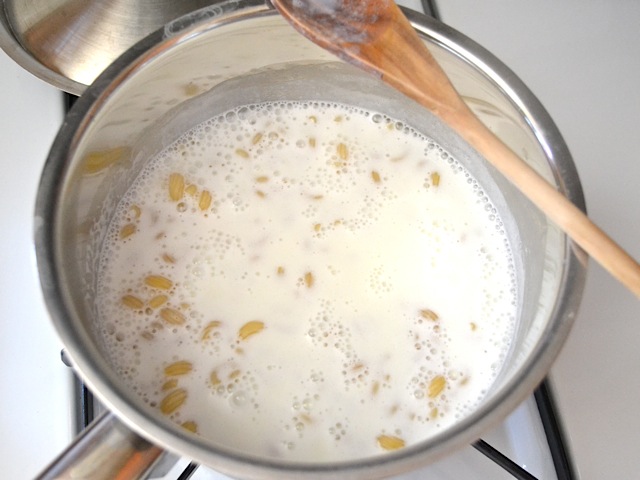
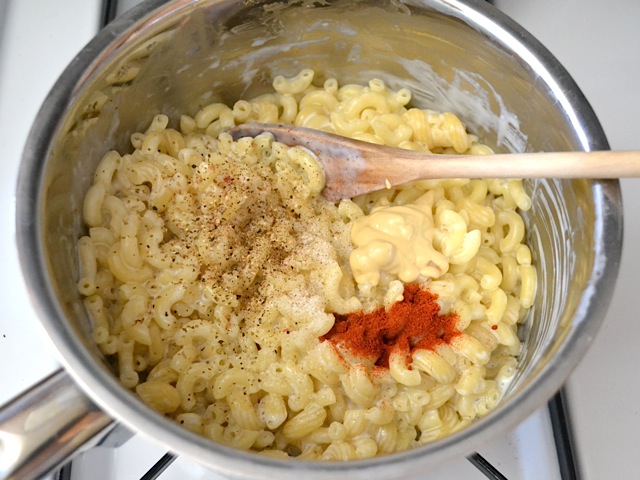
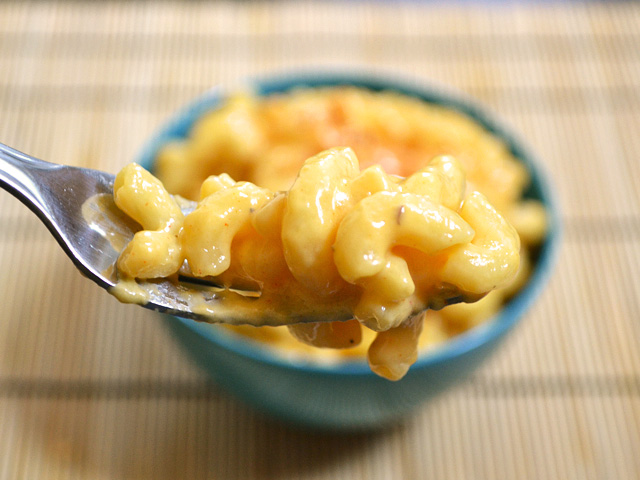
This is a fast and easy recipe from Julie and Susan, two GF sisters and members of the Pontiac Celiac Support group. Thanks girls, looks delish! They said it makes enough to freeze for other meals. Even easier!

4 oz boneless, skinless chicken breast halves
1 1/2 cups chopped onions
1 1/2 cups chopped red, yellow and/or sweet peppers
1 26 oz Dei Fratelli Spaghetti Sauce
4 cups corn pasta (Heartland)
1/2 cup finely shredded Parmesan Cheese

Prep Time: 20 minutes     Cook Time: 20 minutes  Serves 6

1.  Place small amount of oil in large skillet. Add chicken breasts and cook over medium-high heat for 8-10 minutes or until tender and no longer pink (170 F), turning once for light browning on each side. Remove chicken.
2.  Add onions and peppers to skillet. Cook and stir for about 5 minutes or until tender. Cube chicken breasts and add to vegetable mixture. Add spaghetti sauce into skillet and bring to a boil than reduce heat cover and simmer over low heat for 8 minutes.
3.  In sauce pan bring water to a boil and follow package directions for Heartland Corn Pasta.
4. Serve Skillet mixture over cooked spaghetti and sprinkle with shredded Parmesan cheese. As Julie Child said, "Bon Appetit!"

 Heartland products are from Walmart in the regular pasta aisle on the bottom shelf. Dei Fratelli is located at County Market in the pasta aisle and best of all the product is labeled Gluten-Free and their web site indicates "all" their products are GF! Hope this helps to satisfy those Poodle junkie's (like me!) who hate it when your not available for posts. I realized as I was writing to you I didn't take the most important shot.....the prepared, on the plate, garnished, mouth watering image. Shucks! (Bear with the amateurs)  J

I'm Smarter Than a Bunny!

To contact us Click HERE
In this hot weather we have been eating a lot of vegetables and salads. I have a huge garden, but just when my greens are about ready they mysteriously disappear! Now I know why Mr. McGregor got so mad at Peter Rabbit. But I outsmarted them this time. I planted some lettuce, spinach and herbs in  clay pots and put them on the deck with the flowers. They really grow fast this way, probably because we water them all the time, unlike the garden. It's really nice when you are in a hurry and you can walk a few steps and pick things, unlike my real garden which is about a half acre away. I think it looks cute too! Hmm...maybe next year...window boxes full of spinach and kale...bouquets of radishes..pole beans around the mailbox! A dietitian's dream!

The berries in the stores have been great lately, and very reasonably priced. We have been having them everyday for breakfast. I usually didn't buy them in past years because we have berries, cherries and grapes in our yard. But this year it got warm too early and they all flowered and got killed off by the frost. We only had a few cherries for the birds and a few raspberries for the coons. Looks like the only thing we'll get is a lot of blackberries, usually in august, but this year probably July. If you have been buying berries try my recipe for eclair crust or shortcakes and add a little whipped cream for your Father's day celebration.

Easy Gluten-Free Crockpot Lasagna

To contact us Click HERE
Gluten-Free Crockpot Lasagna

Gluten-Free Easy Crockpot Lasagna


1 lb lean ground beef or turkey½ medium onion, chopped1 clove garlic, minced½ tsp salt, optional1 tsp dried oregano1 can (6 oz) tomato paste2 cans (15 oz) tomato sauce1 pkg Tinkyada lasagna noodles, uncooked1 carton (12-16 oz) of cottage or ricotta cheese8 oz mozzarella cheese, shredded¼ cup Parmesan cheese 
Brown ground beef, onion and garlic in skillet. Addseasonings and tomato products. Cook until warm.  (May substitute a jar of GF sauce instead).
To assemble: spoon a layer of meat sauce onto the bottom ofthe Crockpot. Add a double layer of uncooked lasagna noodles, broken to fit.Top with some of each of the cheeses. Repeat layers until all are used up. Thetop layer should not be noodles or they will dry out. Cover and cook on low forapproximately 6 hours.

Hello bloggers! Well you know I like to specialize in easy dishes. Even though it is summer and plenty hot, sometimes you need a hearty dish, hopefully one that does not involve turning on the oven! This is about as easy as it gets and is very versatile. It can be made without meat and also can be made using a jar of spaghetti sauce. Most are gluten-free and some are even starting to list that on the labels. I really like this dish because I did not have any luck boiling the GF lasagna noodles; they kind of fell apart. If I want to make a baked lasagna-like dish I boil Tinkyada penne pasta and layer that in a pan. Hope you enjoy this! Gluten-free Gloria

PS: If you are anywhere near Pontiac be sure to stop by our local support group! Info is listed to the side of this recipe.

Red Pepper Kasha Pilaf

To contact us Click HERE
Red Pepper Kasha Pilaf


Kasha Pilaf 
2 Tblsp olive or Canola oil1 clove garlic, minced1 small onion, chopped1 large red pepper, chopped1 medium zucchini, choppedSalt, optional1/4 tsp pepper½ tsp garlic powder½ tsp onion powder1 Tblsp dry parsley flakes or ¼ cup chopped fresh parsley
1 cup Kasha (roasted buckwheat groats)1 cup vegetable broth or chicken broth1 cup water½ cup grated Parmesan cheese (optional) 
In a large skillet or Dutch oven sauté vegetables andseasonings in oil until slightly browned and soft. Add Kasha, broth, water, andParmesan cheese. Bring to a boil,cover, and reduce heat. Simmer about 10 minutes or until Kasha is fairly soft butstill has a little chew to it.

Hello bloggers! I have been cutting way back on the rice or potato side dishes and going for other grains and vegetables. All of the rice we celiac's have to eat in our breads and things can eventually send your blood sugar up. One of my favorite alternative grains is buckwheat. I have purchased Bob's Red Mill buckwheat groats (kernals in their raw form) and Kasha (buckwheat groats in a roasted form). It is a high protein, fiber rich grain, which is also high in nutrition. I have experimented with both forms as they have different textures and flavors. The raw groats make a good salad or hot breakfast cereal. I liked the Kasha better for a side dish or vegetarian meal. I tried the recipe on the back of the bag of Kasha which calls for coating the grain with an egg and cooking that forst before adding the liquid. That was a very interesting dish too.

You might notice a new category on my blog called "diabetes friendly". I work at a hospital and teach at the Joslin Diabetes Center and the Cardiac Rehab. Many of my patients follow my blog and I am trying to point out the best recipes for them. The diabetes friendly recipes are good for anyone trying to keep their blood sugar down or following a low carb diet.

25 Haziran 2012 Pazartesi

Teddy Bear Picnic

To contact us Click HERE
The other night, my Oldest Girl helped make dinner from a menu she chose. The theme was teddy bears! The idea came from one of my Taste of Home cookbooks and was originally for a baby shower. We made our own pretzel rolls and arranged them in a teddy bear shape, then made teddy bear cookies from a simple sugar cookie recipe.

Our Pretzel Roll teddy.

I ate the teddy's appendages with ham, provolone, romaine, mayonnaise and mustard.

Our teddy bear cookies, before baking. We rolled the dough balls in cinnamon sugar before assembling.

Mini M&Ms and Peanut M&Ms formed their features.

Yep, they're delicious!


My Lunch

To contact us Click HERE
For lunch today, Little One and I shared Quinoa Cakes. They were fabulous as usual! I made the cakes with chopped broccoli and shredded carrots. I served hers plain, but I made a Greek dipping sauce for mine. I simply combined sour cream, a touch of mayo, salt, pepper, crumbled feta, lemon juice, chopped rosemary and chopped oregano in a small bowl.


Little One made short work of hers!

The Little Things ...

To contact us Click HERE
I have often expressed to Handsome that I don't understand why my cooking is special - "I just follow the recipe!" The response I get is, "When have you ever followed a recipe exactly?" And it's so true! I nearly always change some ingredient or method to make the recipe my own. Often, it's things that are easily overlooked or that people think don't matter or won't make a difference. In my experience, though, it really DOES matter! I always try to make every ingredient count. If it doesn't add flavor or nutrition or both - it doesn't make the cut! Sometimes I'll be out of a "special" ingredient so I leave it out or use a substitute - and invariably Handsome says it doesn't taste as good. A perfect example is the apple pie I made for him recently. I didn't have any apple juice, which I usually use in my crust, so I subbed in water. Though he didn't know I'd changed anything he remarked that it wasn't up to my usual standard. I was shocked (and a little pleased!) that he noticed.

All that to say ... The little things matter. We've all heard the somewhat trite expression that the most important ingredient is love, but it's actually true! When you love your family and friends enough to go that extra mile to make the food they eat special, it means a lot. Sure, it's easy (and sometimes necessary!) to open a box of Hamburger Helper or whatever, but when you make it from scratch with healthful ingredients, adapting it to suit their preferences, your love and care over them really shows.

Nacho Cupcakes

To contact us Click HERE
I made some fun Nacho Cupcakes for our college people this afternoon.


They were really simple and fun! I baked chocolate cupcakes and frosted them with orange-tinted cream cheese frosting. The "nachos" are tortillas spread with butter, cinnamon and sugar, cut into triangles, then baked. After they cooled, I stuck 2 or 3 in each cupcake and drizzled them with more frosting. Some I left like that and some I topped with a squirt of strawberry jelly "salsa" and a "jalapeño" made from sour jelly Lifesavers. I made two jalapeños from each Lifesaver by cutting out the middle with an icing tip.

I found the idea on Pinterest, through this link.

Shepherd's Pie

To contact us Click HERE
The other day my friend Amber accompanied me to the grocery store, since I had to do my shopping in the evening. She was picking up a few things she needed, too, including the ingredients to make shepherd's pie. As soon as she said the words I knew I had to make it! I haven't in so long, and I'm really not sure why. Probably my Oldest Girl's aversion to potatoes.

Anyway, here's my take on the classic ...

Shepherd's Pie

Pastry for a single crust pie - I use Jeni's Perfect Pie Crust with some changes: cornmeal in place of the sugar, water instead of apple juice, and regular vinegar instead of apple cider vinegar.

3/4 pound lean ground beef
1/2 onion, diced
1 clove garlic, diced
1 cup finely diced carrots
1 cup green peas
2 tablespoons flour
1 tablespoon vegetable oil
2 cups beef broth
1 tablespoon chopped fresh oregano (1/2 teaspoon dried)
1 tablespoon fresh thyme leaves (1/2 teaspoon dried)
1/2 teaspoon paprika
1 tablespoon apple cider vinegar
salt and pepper

1/2 cup shredded cheddar cheese

3 potatoes, peeled and diced
1/4 cup milk
2 tablespoons butter
1/4 cup sour cream
1 egg

In a large skillet, saute the garlic, onion, and carrots in the oil until they begin to soften. Add the ground beef and cook until the veggies are tender and beef is thoroughly browned. Sprinkle with flour, salt and pepper, and paprika. Cook for 2-3 minutes, then pour in the broth and vinegar, stirring constantly. Add in the peas and herbs. Adjust the seasonings if needed and remove from heat.

Meanwhile, cook the potatoes until tender; drain. Mash them with the milk, butter and sour cream. Add salt and pepper to taste; stir in the egg.

Roll out the pastry and fit it into a greased 9-inch pie plate. Pour in the beef mixture and top with the shredded cheese, then the potatoes. Bake at 350° for 45 minutes.

Now obviously you could streamline this process with store-bought crust and even the mashed potatoes can be purchased. But as I mentioned a couple of weeks ago, you'll be so glad you put in the extra effort for this fantastic meal!

24 Haziran 2012 Pazar

pineapple ginger lassi $0.85 each

To contact us Click HERE

pineapple ginger lassi

$0.85 each
I may have stumbled upon the most refreshing drink on the planet. ...well, one of the most refreshing drinks, anyway.

If you've never heard of a lassi, it's a drink made with yogurt, spices, and sometimes fruit or other ingredients. It's super light, super fresh, and just plain revitalizing. What I LOVE about this drink is how the tart plain yogurt really adds a bright zing. Add in some peppery ginger, and "zing" might be an understatement!

This lassi is lighter and fresher tasting than my usual smoothie, so it's great when I don't want to feel really full. I normally opt for frozen fruit rather than ice cubes in my smoothies, but I wanted this drink to be a "drink" and not a thick, meal-like smoothie. The ice makes it a super cold, liquidy beverage. I used plain yogurt because that's what I always have in my fridge, and I didn't want the flavors muddled by vanilla. Vanilla yogurt would probably be good too, but it will definitely be more dessert like. Also, if you use vanilla yogurt, you may not need as much honey.

One more note: if you're not into fresh ginger, you might try a different spice like cinnamon or cardamom. The fresh ginger in this drink is quite spicy... but that was my favorite part.

Seriously, after a super hard workout, this drink is HEAVEN.

pineapple ginger lassi

Pineapple Ginger Lassi

Print Friendly and PDF

Total Recipe cost: $0.85
Servings Per Recipe: 1
Prep time: 5 min.

INGREDIENTS COST
1/2 cup plain yogurt $0.27
1/2 cup pineapple chunks with juice $0.35
1 inch fresh ginger $0.12
1 Tbsp honey $0.11
4-5 large ice cubes $0.00
TOTAL $0.85

STEP 1: Peel the ginger and then, using a fine cheese grater, grate it straight into the blender (to catch all of the juice). Add the yogurt, pineapple chunks with juice, honey, and ice cubes.

STEP 2: Blend until smooth. Enjoy immediately!

pineapple ginger lassi

Step By Step Photos


pineapple ginger lassi ingredients
This is all you need for this amazing drink... yet another reason why I love it. It's simple and easy to have the ingredients on hand. I like to have the can of pineapple stored in the fridge so that it's cold before I even start.

peel grate ginger
Peel a one inch section of the fresh ginger and then grate it straight into your blender. You want to capture all of that lovely juice that comes out while you're grating.

pineapple
Measure out about a half cup of pineapple chunks and juice. I actually measured out the chunks first, and then about 1/4 cup of juice, but if you just fill the measuring cup up with both at once, it will pretty much be the same.

add to blender
Add the yogurt, pineapple (plus juice), honey, and ice cubes to the blender with the grated ginger.

blend until smooth
Blend until smooth and then enjoy immediately!

pineapple ginger lassi
It's the perfect refresher for those long, exhausting blogging sessions! Ha!

I can't wait to try more lassi flavors!!

roasted garlic pasta salad $8.53 recipe / $1.06 serving

To contact us Click HERE

roasted garlic pasta salad

$8.53 recipe / $1.06 serving
This pasta salad is super easy to throw together and is surprisingly filling! I was also really happy with how creamy and delicious it was, despite the fact that I used part-skim ricotta. It looks and tastes like a really creamy, guilt-inducing pasta salad, when really it's quite innocent!

Half of the reason that I wanted to make this pasta salad is that I wanted to try out a technique that I've been seeing around the internet: roasting garlic in the microwave. I ruined one head of garlic in the process, but I think I got it right after that. The end result isn't as caramelized as real, oven roasted garlic, but the flavor is definitely good enough to make this technique worth it when you're in a hurry. Roasting garlic in an oven can take almost an hour and this only takes 2 minutes - literally!

There are a few different techniques that I've seen, some microwaving for a minute or so, and some for up to 8 minutes (with water added), but I found 2 minutes with no water to be just right for me. I'm sure every microwave is different and each head of garlic will require a slightly different amount of time to cook, so I suggest microwaving in small, one minute increments until you get the technique just right. You want the garlic to be soft, and very fragrant, not brown and hard. Microwaving past the point of softness will only lead you down the road to burnville, and believe me, it doesn't taste or smell pretty!

Oh, one more thing. If you have access to inexpensive fresh basil, it would be to-die-for in this recipe. Just add it on in with the spinach or even in place of the spinach!

roasted garlic pasta salad

Roasted Garlic Pasta Salad

Print Friendly and PDF
Total Recipe cost: $8.53
Servings Per Recipe: 8 (about 1.25 cups each)
Cost per serving: $1.06
Prep time: 10 min. Cook time: 20 min. Total: 30 min.


INGREDIENTS COST
1 head garlic $0.59
1/2 Tbsp olive oil $0.09
1 lb. pasta shells $1.29
15 oz. ricotta cheese $2.45
1/4 cup grated parmesan $0.23
to taste salt & pepper $0.05
1 pint cherry tomatoes $2.50
3 cups baby spinach $1.33
TOTAL $8.53

STEP 1: Using a sharp knife, cut approximately 1/2 inch off the top of the head of garlic. Place the garlic bulb in a small bowl or dish and drizzle 1/2 tablespoon of olive oil over the exposed cloves. Cover the bowl with an inverted plate. Microwave on high, in one minute increments, until the garlic is soft and fragrant (about 2 minutes). Use caution when touching the dishes, they will be very hot. Allow the garlic to cool.

STEP 2: Bring a large pot of water to a rolling boil, add the pasta, and cook for 7-10 minutes or until al dente. Reserve 1/2 cup of the starchy pasta cooking water.

STEP 3: While the pasta is cooking, squeeze the garlic cloves from the head and mince well. Add the minced garlic to a medium bowl along with the ricotta cheese, a healthy dose of freshly cracked pepper, and about 1/2 tsp of salt. Add the 1/2 cup of hot, starchy pasta cooking water. Stir until it forms a smooth sauce.

STEP 4: Drain the pasta. Return the drained pasta to the warm pot (the burner should be turned off). Add the fresh baby spinach and pour the ricotta sauce over top. Slice the cherry tomatoes and add them to the pot as well. Stir until everything is well mixed. Add in the parmesan cheese and stir again. Taste and add salt and pepper to taste. Serve warm!

roasted garlic pasta salad

Step By Step Photos


cut top off of garlic
To cook the garlic in the microwave, begin by cutting a little off the top of the head to expose the cloves.

drizzle garlic with oil
Place the head of garlic in a small dish or bowl and drizzle about a half tablespoon of olive oil over the exposed cloves. This will help keep them from burning.

lid
Place an inverted plate over top of your bowl or dish. Microwave on high, in one minute increments, until the garlic is soft and very fragrant. Mine took two minutes and after that it began to burn (even when I added water to the dish). The garlic will hiss and pop during cooking, and some of the cloves may jump out of the head!

roasted garlic
When it's finished, it will be soft, kind of mushy, and it will smell really REALLY good. The cloves will be about the same color as they were fresh, but they will look slightly transparant. Allow the garlic to cool.

minced garlic
Once it's cool enough to handle, squeeze the garlic cloves out of the head and mince them. They'll likely be pretty sticky.

cook pasta
Bring a large pot of water to a rolling boil and cook the pasta shells according to the package directions (boil 7-10 minutes). When the water gets cloudy and starchy (like in the picture), dip in a measuring cup and reserve a half cup of it for the sauce.

ricotta
While the pasta is cooking, place the minced garlic, ricotta cheese, freshly cracked pepper, and about a 1/2 tsp of salt in a bowl.

ricotta sauce
Add a half cup of the hot, starchy pasta water and stir until it is all smooth.

cherry tomatoes
Slice the cherry tomatoes in half.

combine ingredients
When the pasta is finished cooking, drain it well and then return it to the warm pot (make sure the burner is turned off). Add the fresh baby spinach, the ricotta sauce, and sliced tomatoes. The residual heat will slightly wilt the spinach leaves.

stir to combine
Stir everything until combined, and then add the parmesan cheese and stir again. The reason I added the parmesan at the end is because I didn't want it to melt from the heat. Once everything is combined, the temperature is considerably lower and you won't have melted parmesan cheese clumping up and sticking to the spoon. It just evenly coats everything instead.

roasted garlic pasta salad
Taste the pasta salad and add salt and pepper as needed. I like to add freshly cracked pepper to each serving.

miracle mac n' cheese $2.72 recipe / $0.68 serving

To contact us Click HERE

miracle mac n' cheese

$2.72 recipe / $0.68 serving
It's a miracle. Macaroni and cheese that is smooth, creamy, and gooey, is made in one pot, requires only a few ingredients, and is every bit as easy as the blue box. I'm serious. Seriously serious.

I've seen versions of this recipe around the internet for a while and I really don't know what took me so long to try it out, but thank god I finally did. This is going to be a new staple in my house and if you're a fan of mac n' cheese then you MUST try this today.

Why does it work? Well, if you're familiar with regular macaroni and cheese recipes, then you know you have to go through the whole bechamel sauce process, which can be tedious and absolutely terrifying to new cooks. The roux in the bechamel sauce is what helps the cheese melt into the sauce rather than sticking together in one big, melted clump. It's those tiny flour particles that keep everything uniform and smooth. Wellll, this recipe has a short cut version of that. By simmering the pasta in the milk, all of those little starch particles that usually make your pasta water cloudy are in the milk acting just like the flour in the bechamel sauce!! It's a one step process! BINGO!

Anyway, when I came across this recipe on pinterest and saw the process for the 100th time, I finally decided to give it a try. ...and I hope I've convinced you to do the same today.

I used sharp cheddar and I've found that cheddar melts in better than other cheeses. I seasoned with salt, pepper, smoked paprika, and a bit of dijon, but you can use your own blend. Onion or garlic powder would make a nice, subtle mac n' cheese and a dash of hot sauce will add a zing. Use your taste buds to make it your own!

miracle mac n' cheese

Miracle Mac n' Cheese

Adapted from Revolutionary Mac & Cheese from Macaroni & Cheesecake

Print Friendly and PDF

Total Recipe cost: $2.72
Servings Per Recipe: 4 (one cup each)
Cost per serving: $0.68
Prep time: 5 min. Cook time: 20 min. Total: 25 min.

INGREDIENTS COST
2.25 cups milk $0.70
2 cups (1/2 lb.) dry macaroni $0.65
1 cup shredded cheddar cheese $1.25
3/4 tsp salt $0.04
1 tsp dijon mustard (optional) $0.04
1/4 tsp smoked paprika (optional) $0.02
10-15 cranks fresh cracked pepper (optional) $0.02
TOTAL $2.72

STEP 1: Combine the dry macaroni and 2 cups of milk in a medium pot. Place a lid on top and bring it up to a boil over medium/high heat while occasionally stirring.

STEP 2: As soon as it reaches a boil, reduce the heat to low and let simmer until the pasta is tender (about 10-15 minutes). Make sure to stir often during this process to keep the pasta from clumping or sticking to the bottom of the pot. Promptly replace the lid each time to help hold in the moisture.

STEP 3: Once the pasta is soft and has absorbed most of the milk, season with salt, pepper, paprika, and dijon, or the spices of your choice. If the mixture begins to look dry, add the remaining 1/4 cup of milk.

STEP 4: Turn the heat off and stir in the shredded cheese. Serve immediately.

miracle mac n' cheese


Step By Step Photos


dry macaroni and milk
First, combine the dry macaroni noodles and 2 cups of milk in a medium pot. I used 2% milk and it was quite perfect.

bring to boil
Place a lid on top to help hold in moisture and heat. Bring the pot up to a boil over medium/high heat, stirring every few minutes or so. I wouldn't suggest turning the heat all the way up to high because milk can be delicate and may scorch.

simmer
As soon as it reaches a boil, reduce the heat to low and let it simmer until the noodles are soft and have absorbed most of the milk (about 10-15 minutes). It is VERY important to stir often during this process and replace the lid as soon as possible after doing so.

season
I like to season the mixture before adding the cheese because I feel like it dissolves in easier. Season with whatever you like. A little bit of salt (.5 to 1 tsp) is pretty necessary, but after that just go with it. Even just a touch of onion powder would be great. The type of cheese you're using will also dictate what seasonings to use. If the mixture begins to look dry here, add a little bit more milk. Turn the heat off at this point.

add cheese
Add the shredded cheese and stir it in. The residual heat should be enough to melt it into the seasoned milk mixture. I love that this recipe only needs 1 cup of cheese... most macaroni recipes require 2 cups, plus a bechamel sauce made with butter.

smooth, creamy, mac and cheese
And then, like magic, you have a smooth, creamy, super cheesy macaroni and cheese! In less than 30 minutes! And no more steps required than with a box mix... it's a miracle.

miracle macaroni and cheese
Really easy macaroni and cheese made with REAL ingredients.